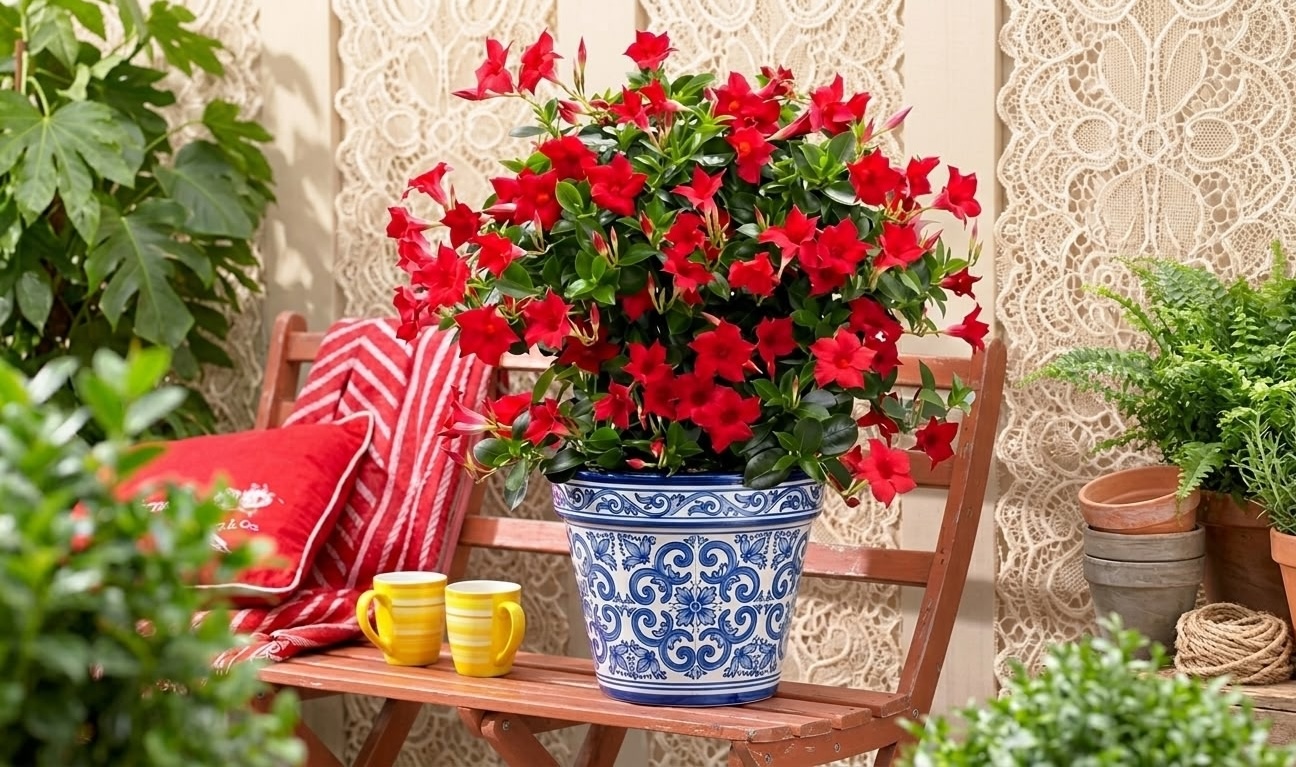
Dipladenia is the flowering plant that shows up at every garden center in early summer wearing bold red, pink, and white blooms — compact, prolific, and practically impossible to ignore. Despite some confusion around its name (sold as “dipladenia,” “mandevilla,” and “Rio” depending on the retailer), this tropical beauty is one of the most rewarding summer bloomers you can grow in a pot.
The formula for success is simpler than most people expect: as much direct sun as you can give it, moderate watering with good drainage, and a warm protected place to spend winter. Get those three things right and dipladenia goes from seasonal decoration to a plant you genuinely look forward to bringing back out each spring.
This guide covers every aspect of dipladenia plant care, including the sections most other articles skip: what to do when it stops blooming, how to overwinter it without losing it, and how to bring it back to full flowering form the season after.
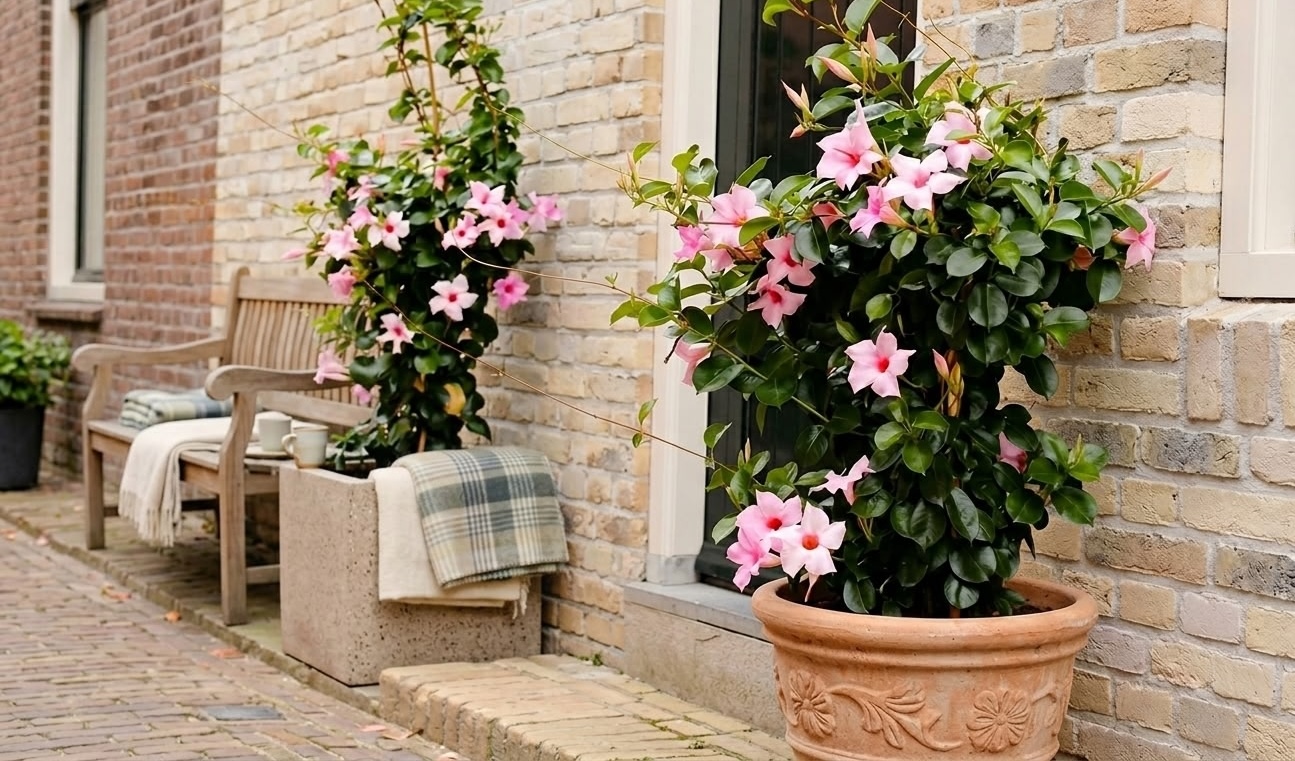
Quick Dipladenia Care Reference
| Care Factor | Requirement |
|---|---|
| Light | Full sun; 6+ hours direct sun for best blooming |
| Water | Let top 1–2 inches dry between waterings; much less in winter |
| Soil | Well-draining potting mix; add perlite if needed |
| Temperature | 65–80°F (18–27°C) optimal; bring indoors before 50°F (10°C) |
| Humidity | Moderate; tolerates average indoor levels |
| Fertilizer | Balanced in spring; switch to high-phosphorus for blooming |
| USDA Zones | Perennial in zones 9–11; elsewhere treat as annual or overwinter indoors |
| Toxicity | Toxic to cats, dogs, and horses (skin irritant; mild GI) |
What Is Dipladenia? (And Why the Name Situation Is Confusing)
Dipladenia (Mandevilla sanderi and related hybrids) is a tropical flowering plant native to Central and South America, prized for its large, funnel-shaped flowers in red, pink, white, and yellow. In modern botanical classification, dipladenia falls within the genus Mandevilla, family Apocynaceae — so technically, all dipladenias are mandevillas.
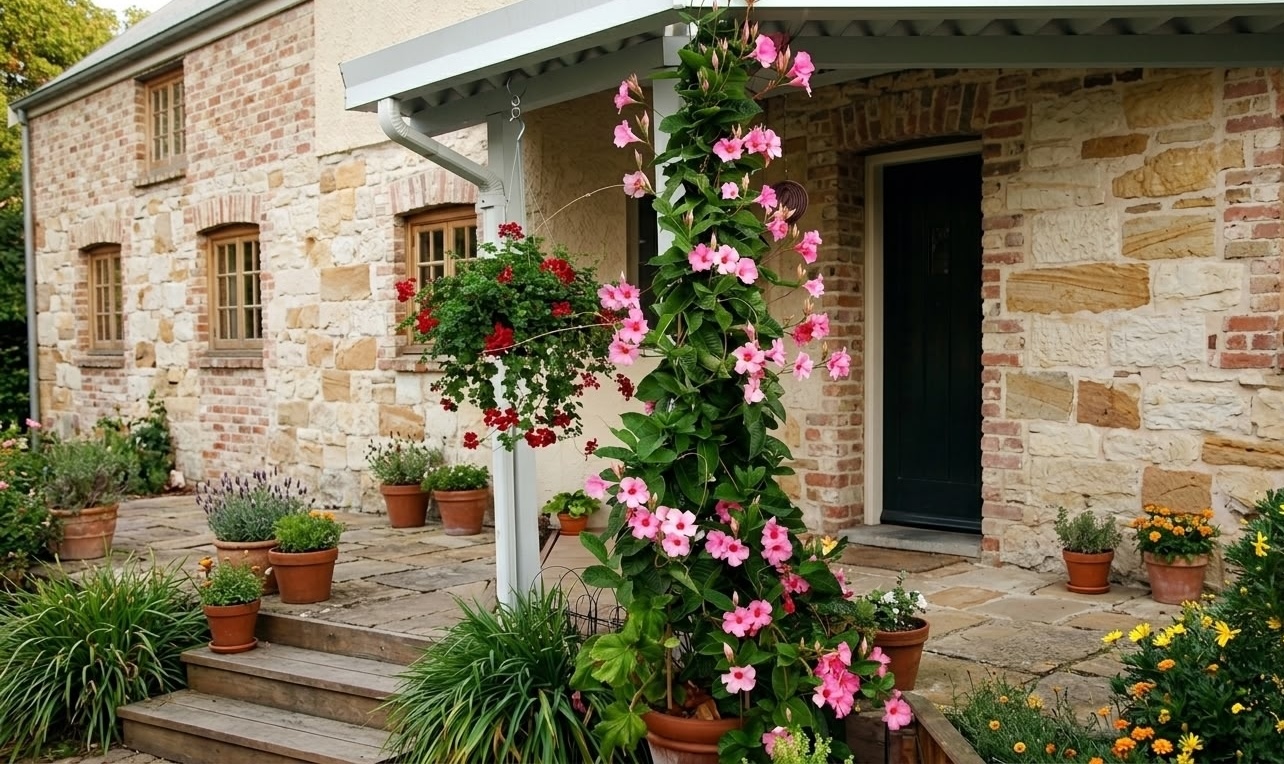
The distinction you’ll see in garden centers is a practical retail one, not a scientific one. “Dipladenia” refers to the compact, bushy, small-leafed varieties that stay contained in a pot, while “mandevilla” refers to the vigorous vining forms that climb trellises, fences, and walls. Both come from the same genus; the label tells you about growth habit, not species.
The most common “dipladenia” you’ll see sold is the Rio series — a branded commercial line bred specifically for compact, container-friendly growth and prolific blooming. When a garden center tag says “Dipladenia Rio Red” or “Rio Pink,” that’s what you’re getting: a shrubby, 12–18 inch plant bred to stay tidy in a pot.
Dipladenia vs. Mandevilla: What’s Actually Different
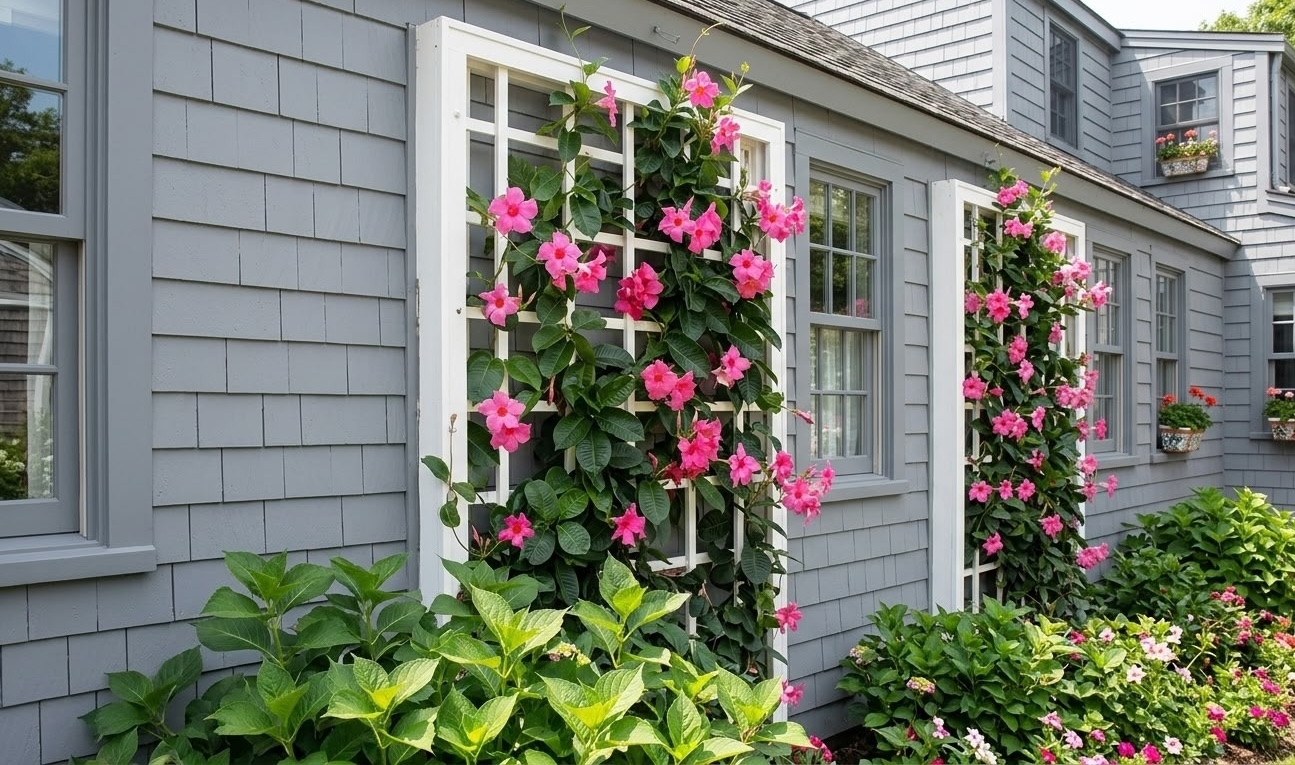
The two plants are often sold side by side, and the visual difference is real even if the botanical boundary is fuzzy.
| Feature | Dipladenia | Mandevilla |
|---|---|---|
| Growth habit | Compact, bushy shrub | Vining; climbs by twisting stems |
| Height | 12–24 inches in a pot | 6–20 feet when trained on a trellis |
| Leaves | Smaller, rounded, narrower | Larger, broader, glossier |
| Flowers | Smaller blooms, produced in clusters | Larger individual blooms |
| Best use | Patio containers, window boxes, hanging baskets | Trellises, fences, pergola posts |
| Training | Not needed; naturally bushy | Needs support to climb |
If you want something that looks great in a pot without any fussing, get the dipladenia form. If you have a trellis or fence and want a tropical statement plant that covers a structure over the summer, get a mandevilla vine. Care requirements are nearly identical for both.
Light: Give It as Much Sun as You Have
Dipladenia is a full-sun plant. For reliable, heavy blooming it needs at least 6 hours of direct sunlight per day — ideally more. Partial shade produces a healthy-looking plant with noticeably fewer flowers. Deep shade produces a plant that doesn’t flower at all and eventually declines.
The main exception is afternoon heat in climates above zone 9: in the deep South or desert Southwest, light afternoon shade prevents leaf scorch during the hottest hours (3–6 PM). Morning sun is always fine and can be maximized without risk. Everywhere else, south or west exposure for maximum light is the goal.
For container plants on a patio or deck, position in the sunniest spot available. On a covered porch or under a tree canopy, expect significantly reduced flowering. If you’re growing dipladenia as a houseplant indoors during winter, a south-facing window with direct sun — or supplemental grow lights — is the minimum for keeping it alive and reblooming.
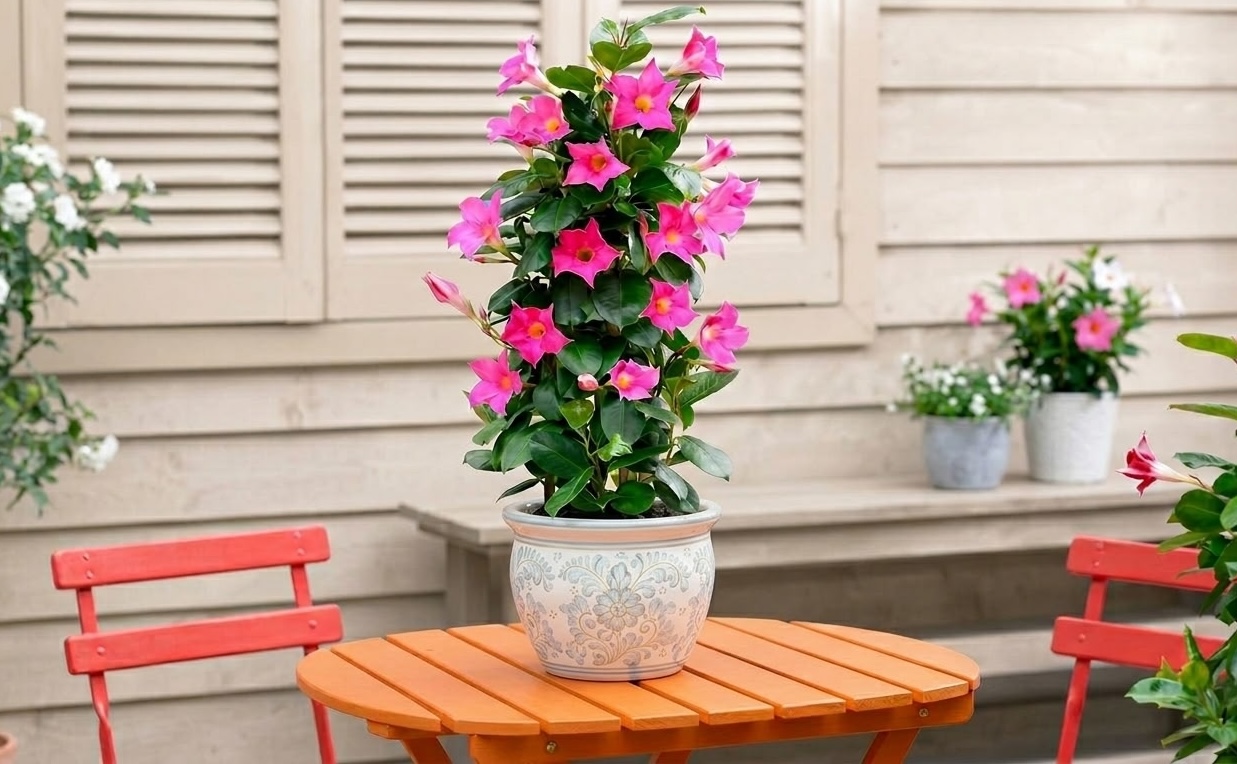
Watering Dipladenia: The Top-Inch Rule
Dipladenia has naturally thick, somewhat succulent roots that store water — it evolved in seasonally dry tropical environments. This means it handles short dry spells better than most flowering plants, and it absolutely cannot tolerate consistently wet soil. Overwatering is the single most common cause of dipladenia problems.
The rule: let the top 1–2 inches of soil dry out between waterings, then water thoroughly until it drains from the bottom. In summer heat with the plant actively growing and flowering, that might be every 3–5 days in a small pot, every 7–10 days in a larger one. Feel the soil before watering — if it’s still moist 2 inches down, wait.
In practice, this works out to roughly every 7–10 days in summer heat and every 2–3 weeks in cooler fall weather. During dormant overwintering storage, once a month is typically enough to prevent the roots from drying out completely.
Signs you’re overwatering: yellowing lower leaves, soft or dark stems at the base, no new growth despite adequate light. Signs you’re underwatering: leaves wilting or curling inward, dry brittle soil pulling away from the pot sides.
In winter, dramatically reduce watering. A plant kept semi-dormant in a cool indoor spot needs water only once every 3–4 weeks — just enough to prevent the roots from completely desiccating. A plant actively kept growing under lights needs more, but still less than in summer.
Soil and Potting
Dipladenia needs well-draining soil above everything else. Standard potting mix works, but improve it by mixing in 25–30% perlite to increase drainage and aeration. The roots need oxygen; soggy, compacted soil suffocates them even before root rot sets in.
Target soil pH of 6.0–7.0 — slightly acidic to neutral. Most commercial potting mixes fall in this range naturally. Avoid heavy garden soil in containers; it compacts too much and drains too slowly.
Always use a pot with drainage holes. Terra cotta dries faster than plastic or glazed ceramic, which can help in wet climates or if you tend to overwater. Repot when roots are visibly circling the bottom or emerging from drainage holes — typically every 1–2 years, moving up one pot size at a time. Spring is the right time for repotting, just before active growth begins.
One practical note: dipladenia actually tolerates being somewhat root-bound and may bloom better when slightly pot-bound than when given too much space. A container 2 inches larger than the current root ball is the right move. For a standard nursery transplant, an 8-inch pot is appropriate; for large established plants, cap compact varieties at 12 inches.
When and How to Repot Dipladenia
Repot in spring before active growth begins — never in fall or winter when the plant is slowing down. Signs it needs a new pot: roots circling the bottom or emerging from drainage holes, soil drying out much faster than usual, or the plant looking root-bound and stressed despite adequate care.
Move up by only one pot size (2 inches wider than the current container). Going too large at once encourages root development at the expense of blooming — dipladenia actually tends to flower better when slightly pot-bound. For a standard 4–6 inch nursery transplant, an 8-inch pot is the right starting size. For compact Rio varieties, cap at 12 inches; beyond that, the pot holds too much moisture and energy goes into roots rather than flowers.
When repotting, refresh the potting mix completely rather than just adding soil on top. This clears any salt buildup from fertilizers and resets the drainage structure.
Temperature and Humidity
Optimal growing temperature for dipladenia is 65–80°F (18–27°C). Below 60°F (15°C), growth slows. Below 50°F (10°C), the plant stops growing and begins to struggle. Below 45°F (7°C), cold damage becomes likely. Frost kills it outright.
In USDA hardiness zones 9–11, dipladenia can stay outdoors year-round and functions as a perennial. In zones 4–8, it’s either grown as an annual (replaced each year) or brought indoors before temperatures drop in fall. See the overwintering section below for how to keep it alive through winter.
Humidity requirements are moderate. Dipladenia thrives at 40–60% relative humidity — typical of most homes. In very dry indoor environments during winter, grouping it with other plants or placing the pot on a pebble tray with water adds enough ambient moisture without requiring a humidifier. In very dry indoor environments during winter, occasional misting or a pebble tray with water helps, but it’s not critical the way it is for orchids or ferns.
Fertilizing for Maximum Bloom
Fertilizer directly controls how many flowers dipladenia produces — and the type of fertilizer matters as much as the schedule.
During the growing season (spring through summer), feed every 2 weeks with a balanced liquid fertilizer (10-10-10 or similar) to support healthy leaf and stem growth. Once the plant is actively growing well and has established good foliage, switch to a high-phosphorus bloom booster such as 10-20-10 (the recommended ratio from Clemson Extension) or any fertilizer with a higher middle number. Phosphorus is the nutrient that triggers flower production; nitrogen feeds leaves. A plant getting too much nitrogen and not enough phosphorus will look lush and green but produce minimal flowers.
Stop fertilizing in late summer to early fall as days shorten, and do not fertilize at all during winter dormancy. Every 6–8 weeks during the active growing season, water thoroughly with plain water (no fertilizer) to flush mineral salt buildup from the potting mix. Salt accumulation from regular liquid feeding mimics the symptoms of overwatering and causes brown leaf tips if left unchecked. Resume in spring once you see new growth emerging.
How and When to Prune Dipladenia
Pruning dipladenia has two purposes: shaping the plant and increasing flower production. Flowers form at stem tips, so more branch tips means more blooms. Pruning creates those tips.
Spring pruning: The main pruning event. Before new growth emerges in spring (or when you’re bringing the plant back out of winter storage), cut stems back by up to one-third. Make cuts just above a leaf node — the small bump where leaves attach. Each cut stem will fork into two, doubling the tip count and eventually the flower count. A plant pruned down from 8 long stems to 16 shorter ones will bloom significantly heavier the following season.
Pinching during the growing season: Pinch the growing tips (top 1–2 inches of each stem) every few weeks from late spring through early summer. This encourages lateral branching and a bushier shape without removing major stems. Stop pinching in midsummer so the plant can channel energy into flower production for the rest of the season.
Removing spent flowers: Deadheading (removing finished flowers) is optional on dipladenia — it sheds blooms on its own — but deadheading spent flower clusters encourages new buds to form slightly faster.
Overwintering Dipladenia Indoors: How to Keep It Alive Through Winter
This is the section most people struggle with, and it’s also where most dipladenia plants are lost. Getting overwintering right is the difference between having a multi-year plant and buying a new one every spring.
When to Bring It Inside
Move dipladenia indoors before nighttime temperatures consistently drop below 50°F (10°C) (10°C). Don’t wait for frost. In most of the US, that means bringing it inside in September or early October. In zone 8, late October. Earlier is safer than later — cold stress makes recovery slower and pests more likely.
Check for Pests First
Before bringing the plant inside, check carefully for spider mites, aphids, mealybugs, and scale. These pests are manageable outdoors but multiply rapidly in warm, dry indoor conditions and will spread to other houseplants. Treat with insecticidal soap or neem oil, let dry completely, and then bring the plant inside. Check the undersides of leaves, stem joints, and soil surface.
Two Overwintering Methods
Method 1 — Dormancy (cool, low-light location): Move the plant to a basement, garage, or cool room that stays between 50–60°F (10–15°C) with minimal light. Water just once per month — barely enough to keep the roots from desiccating. The plant will drop most or all of its leaves. This is normal; it’s not dead. The roots and woody stems are alive. You’re keeping it in suspended animation until spring.
Method 2 — Active growing (warm, bright window): Keep the plant in a south-facing window with as much direct sun as possible, maintain temperatures above 60°F, and water as you would in summer (less frequently, but when the top inch dries). The plant may continue to bloom lightly or may rest. Fertilize minimally or not at all until spring.
Dormancy is easier and requires less attention. The active growing method is better if you have a genuinely bright window and want to keep the plant looking good indoors through winter.
Bringing It Back Outside in Spring
Move dipladenia back outdoors after the last frost date when nighttime temperatures are reliably above 55°F (13°C). Acclimate it gradually — 30 minutes of morning sun the first day, 1 hour the second, increasing over a week before leaving it in full sun. Plants that overwinter in low light have lost their sun tolerance and will scorch without this transition.
After dormancy, the plant will push out new growth before blooming — expect 4–6 weeks of leafing out before flowers appear. After active indoor growing, blooming resumes faster once it gets outdoor sun again. Either way, spring pruning and resuming fertilizer is the trigger for the season’s bloom.
How to Get a Dipladenia to Bloom Again
Dipladenia not blooming is the most common complaint after overwintering, but it also happens with established plants that were growing fine. The causes are almost always diagnosable.
| Symptom | Likely Cause | Fix |
|---|---|---|
| Healthy green growth, no flowers | Too much nitrogen fertilizer; too little light | Switch to high-phosphorus bloom booster; move to more sun |
| After overwintering: leafing out but no buds | Plant is recovering; normal process | Wait 4–6 weeks after new growth appears; ensure full sun outdoors |
| Pale, leggy stems with sparse flowers | Insufficient light indoors or in shade | Move to fullest sun available; supplement with grow lights if indoors |
| Plant looks healthy but no buds at all | Missed spring pruning; too much nitrogen; not enough sun | Light prune, then high-phosphorus fertilizer; assess light conditions |
| Buds forming but dropping before opening | Sudden temperature change; too dry; overwatering | Stabilize temperature and moisture; maintain consistent watering |
One trigger for reblooming that many sources miss: dipladenia responds to slightly cooler nights (60–65°F / 15–18°C) to initiate bud set. In late summer, cooler outdoor nights often trigger a second flush of blooming. If growing indoors and the plant is healthy but budless, a week of slightly cooler nights can sometimes break the stall.
How to Propagate Dipladenia
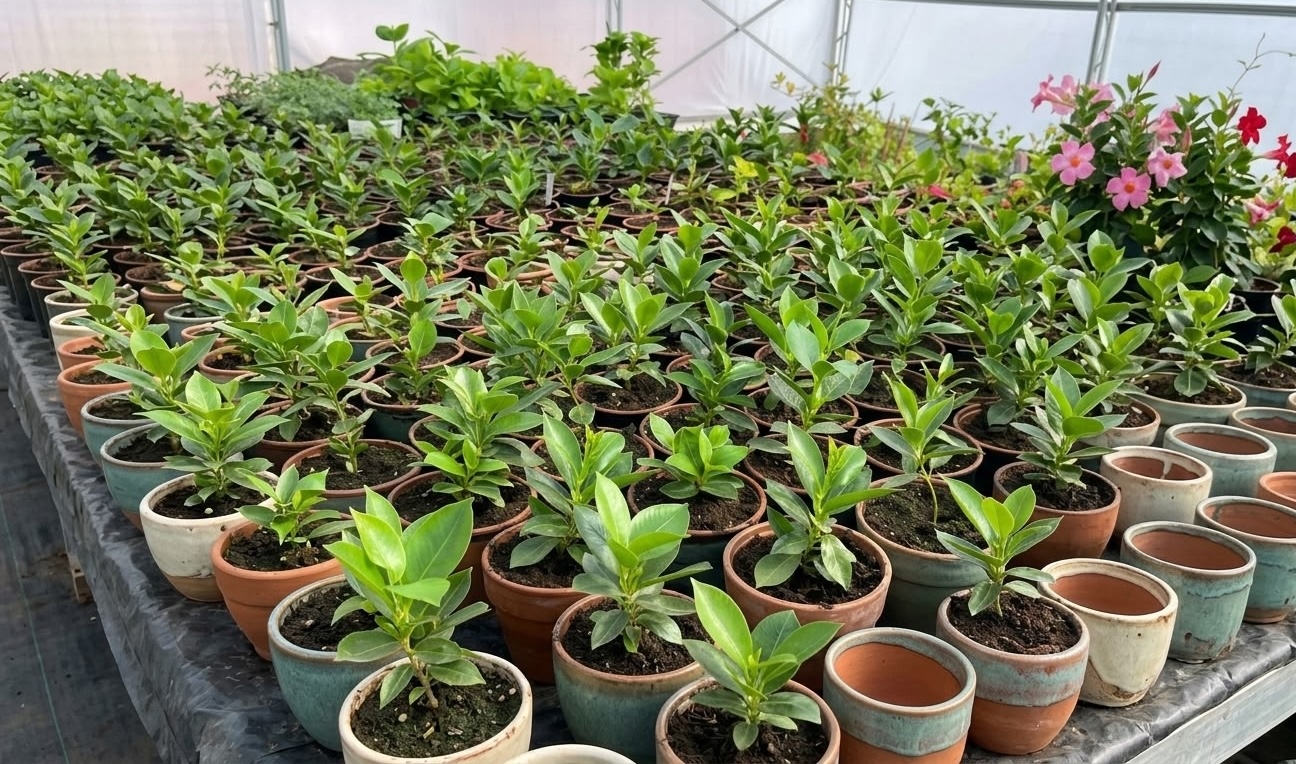
Dipladenia is propagated from stem tip cuttings. Individual leaves won’t root — you need a stem section with multiple leaf nodes. Spring and early summer give the highest success rates.
Step 1: Take the cutting. Cut a 4–6 inch tip from a healthy non-flowering stem. Make the cut just below a leaf node. Remove all leaves from the lower half of the cutting, leaving 2–3 pairs at the top.
Step 2: Apply rooting hormone. Dip the cut end in powdered or liquid rooting hormone. This isn’t strictly required but noticeably improves rooting speed and success rates.
Step 3: Plant in a rooting medium. Insert the cutting into moist perlite, a 50/50 perlite-vermiculite mix, or coco coir. Avoid regular potting soil — it’s too heavy and holds too much moisture during the fragile rooting stage.
Step 4: Maintain humidity. Cover the cutting with a clear plastic bag or plastic bottle to maintain high humidity around the cutting. Place in bright indirect light — not direct sun, which wilts unrooted cuttings. Open the cover briefly each day to exchange air.
Step 5: Wait. Roots form in 3–5 weeks. Resistance when you gently tug the stem is the sign that roots have established. Move to a small pot with potting mix once the roots are 1–2 inches long.
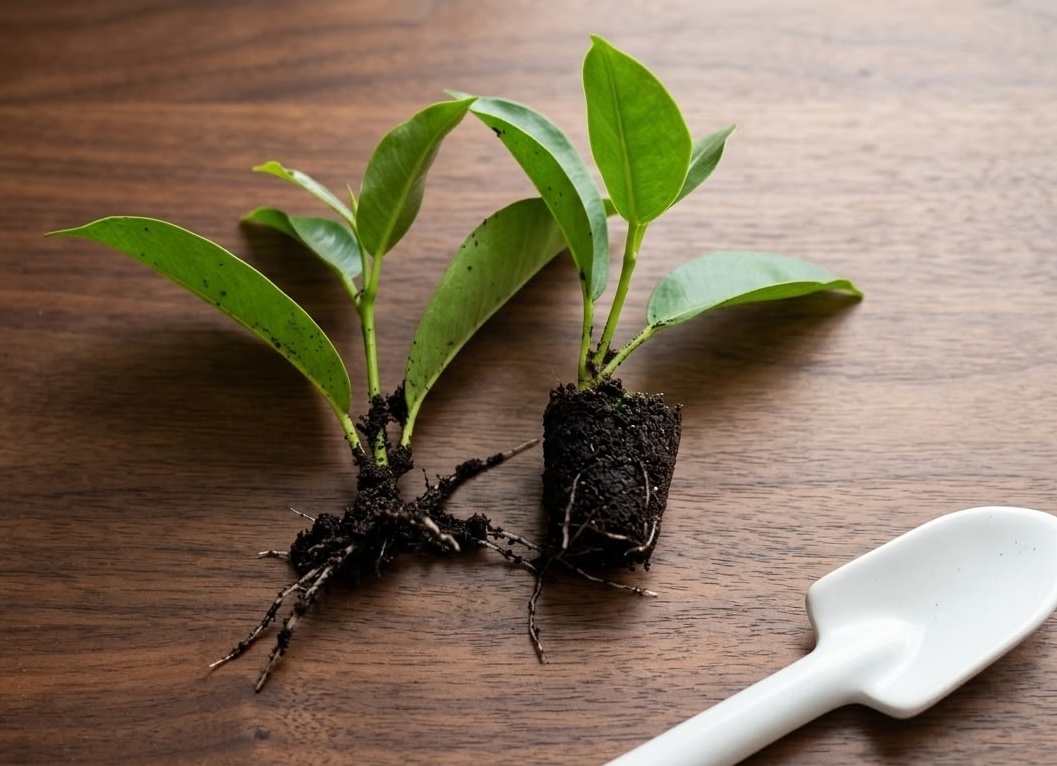
You can also root cuttings in water — place the prepared cutting in a glass of clean water, change water every 2–3 days, and pot up when roots are 1–2 inches long. Water rooting lets you see the roots forming, but the transition to soil can be slightly more stressful for the cutting than direct rooting in perlite.
Common Dipladenia Problems and How to Fix Them
Dipladenia Leaves Turning Yellow
Yellow leaves on dipladenia have several distinct causes, each with a different pattern:
- Overwatering: Lower leaves yellow first; soil stays wet; stems may feel soft at the base. Fix: reduce watering, improve drainage, let soil dry more between waterings.
- Underwatering: Leaves yellow then crisp and brown; soil bone dry. Fix: water more consistently; check if pot has become root-bound (fast-draining pots dry out quickly).
- Natural leaf drop: Normal shedding of older inner or lower leaves, especially in fall as the plant prepares for dormancy. Fix: none needed if only a few leaves yellowing on mature stems.
- Nutrient deficiency: Yellowing between leaf veins (veins stay green = iron deficiency/chlorosis). Fix: fertilize with a balanced fertilizer containing micronutrients; check that soil pH isn’t too high (above 7.0 locks out iron).
- Cold damage: Yellow to brown patches on leaves after cold exposure. Fix: move to warmer location; remove damaged foliage; plant will recover if cold wasn’t severe.
Bud Drop
Buds forming but falling off before opening usually signals an abrupt change in conditions: sudden temperature drop, being moved indoors from outdoors, inconsistent watering, or very low humidity. Once conditions stabilize, bud set continues normally. Avoid moving dipladenia when it has buds set — even an inch or two toward or away from a window can trigger drop.
Leggy Growth with Few Flowers
Long stems with large gaps between leaves and sparse blooms means the plant isn’t getting enough light. Dipladenia stretches toward light it can’t quite reach. Move it to a brighter location and do a light prune to encourage bushier branching. The new growth in full sun will be compact and flower-productive.
Spider Mites
The most common dipladenia pest, especially indoors in dry conditions. Signs: fine webbing between leaves, tiny moving dots on leaf undersides, bronze or stippled appearance on upper leaf surfaces. The plant is being drained of cell contents by thousands of tiny mites feeding.
Treatment: rinse the plant forcefully with water (undersides of leaves especially), then apply insecticidal soap or neem oil spray. Repeat every 5–7 days for 3 weeks to break the life cycle. Raise indoor humidity — mites thrive in dry conditions. Important: avoid neem oil while the plant is actively flowering — it causes bud drop. Use insecticidal soap during bloom; resume neem oil between bloom cycles.
Aphids
Soft-bodied insects clustered on new growth and flower buds, often greenish or black. They excrete honeydew (sticky residue) and can transmit plant viruses in large infestations. Remove by hand-picking or hard water spray, then follow with insecticidal soap. A single well-targeted spray often handles an aphid infestation completely.
Mealybugs
White cottony masses in leaf axils and stem joints, most visible when you peel back leaves at branch junctions. Mealybugs are harder to eliminate than aphids because they protect themselves under their waxy coating. Treat with isopropyl alcohol on a cotton swab applied directly to each mass, followed by neem oil spray. Repeat weekly for 4–6 weeks.
Fungal Diseases: Powdery Mildew, Botrytis, and Fusarium
Three fungal issues affect dipladenia in specific conditions:
Powdery mildew — white or grayish powdery coating on leaf surfaces, typically in warm days + cool nights with poor air circulation. Treat with a sulfur-based fungicide or dilute neem oil (only when not in bloom). Improve air circulation and avoid overhead watering.
Botrytis blight (gray mold) — fuzzy gray coating on stems or flower buds in cool, wet, humid conditions. Caused by water sitting on foliage. Water at the base only, never overhead. Remove and discard affected tissue; do not compost it.
Fusarium wilt — one-sided wilting and yellowing that starts on one stem and progresses, caused by a soil-borne fungus. Fusarium is difficult to treat once established; if one plant in a container is severely affected, removing it and replacing the potting mix is the safest option to prevent spread to other plants.
Root Rot
Caused by consistently wet soil and poor drainage. Symptoms: wilting despite wet soil, dark mushy roots (healthy roots are white or tan and firm), foul smell from soil. Treatment: remove the plant from its pot, cut away all dark soft roots back to healthy tissue, let the roots air-dry for 30 minutes, repot in fresh dry potting mix with improved drainage, and hold off watering for 5–7 days to let any remaining root wounds callous. Root rot caught early is survivable; root rot caught late usually isn’t.
Leaf Scorch
Brown crispy patches on leaf surfaces — particularly on the parts of leaves facing the sun — from too-intense direct afternoon sun in hot climates, or from moving a plant from indoors directly into full outdoor sun without acclimation. Scorched areas won’t recover (damaged tissue is dead), but new leaves will grow in normally once the plant is repositioned or acclimated.
Dipladenia Varieties
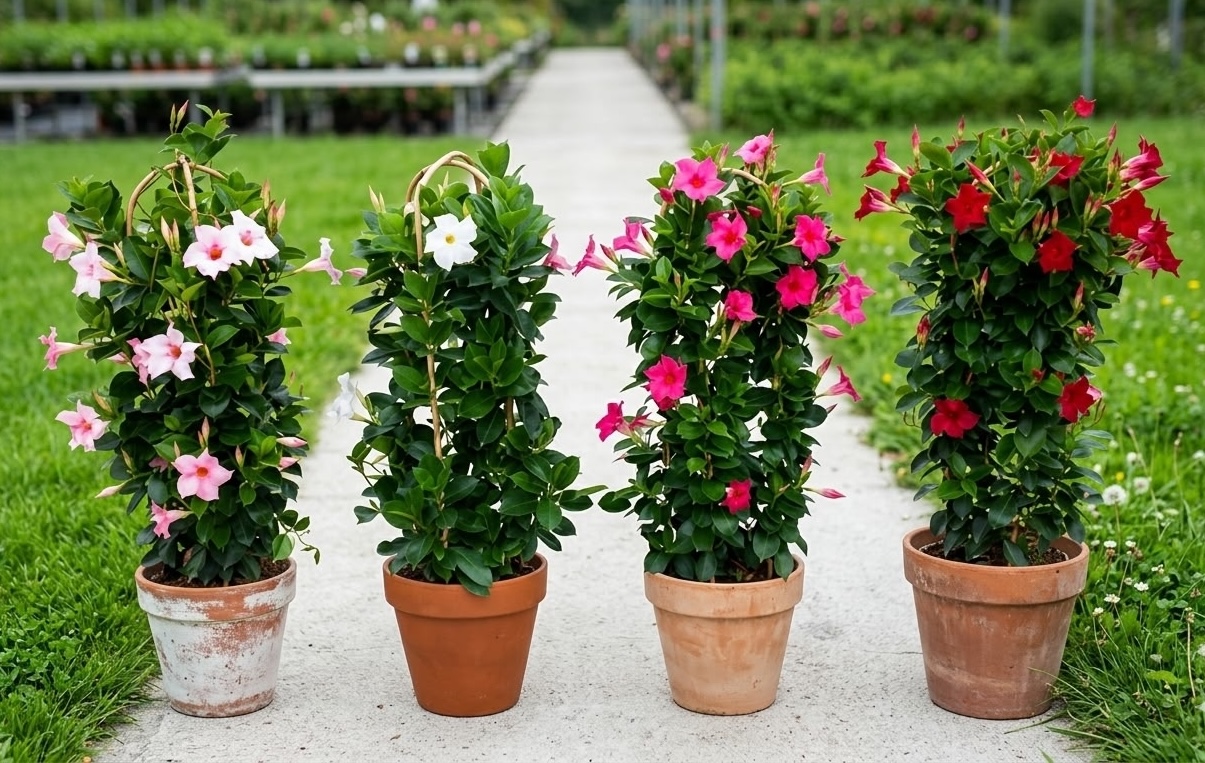
The naming situation in retail makes variety shopping confusing, but these are the main groups you’ll encounter:
- Rio series — the dominant “dipladenia” line at garden centers and big-box stores. Produced and distributed by Fernlea Flowers. Comes in red, pink, hot pink, white, and yellow. Stays under 18 inches without any training. If your plant tag says “Dipladenia Rio,” this is it.
- Sundaville series — a premium commercial line with larger flowers and slightly more size. Some Sundaville varieties are compact (Sundaville Compact Red, Cream Pink) and others are more vining. Better-known in European markets; increasingly available in the US.
- Mandevilla sanderi ‘Rosea’ — the classic species-form dipladenia with small rose-pink flowers; less showy than modern hybrids but often easier to find at specialty nurseries.
- Mandevilla splendens — the large-flower vining mandevilla sold under “mandevilla” labels; vivid pink blooms on a plant that climbs to 20 feet. Not a true “dipladenia” form but botanically the same genus.
- Mandevilla boliviensis — the “white dipladenia”; compact growth with white flowers bearing a yellow throat. Distinct look from the typical red/pink varieties and sometimes better suited to cooler conditions.
Is Dipladenia Toxic to Cats and Dogs?
Yes. The ASPCA lists Mandevilla species as toxic to cats, dogs, and horses. The plant’s sap contains compounds that cause contact dermatitis in humans with sensitive skin and more significant reactions in pets. Ingestion can cause vomiting, drooling, and diarrhea.
The toxicity level is considered mild to moderate — not in the same category as highly dangerous plants like lilies or sago palm — but a pet that repeatedly chews on dipladenia foliage or stems can develop GI symptoms and skin irritation. Keep the plant out of reach of animals that have shown interest in chewing plants, and wear gloves when pruning or handling the milky sap.
5 Dipladenia Care Mistakes That Kill Blooming
Most dipladenia problems trace back to a short list of repeatable mistakes. These aren’t edge cases — they’re the ones that come up constantly in garden forums and extension Q&A pages.
- Too much nitrogen fertilizer. A high-nitrogen fertilizer tells the plant to put all its energy into foliage. The plant looks lush and green and produces almost no flowers. Switch to a high-phosphorus bloom booster and you’ll see buds within 2–3 weeks during the growing season.
- Watering on a fixed schedule instead of checking the soil. “Water twice a week” is wrong advice for a plant that depends on its pot size, sun exposure, and season. Water when the top 1–2 inches are dry — some weeks that’s twice, some weeks it’s once. Consistent overwatering from schedule-based care is the most common cause of root rot.
- Leaving it outdoors too long in fall. Many people wait until frost is imminent to bring dipladenia indoors. By that point, cold stress has already weakened the plant, making recovery and spring regrowth slower. Move it inside when nighttime lows consistently approach 50°F — before the plant shows any sign of stress.
- Not pruning in spring. A dipladenia that isn’t pruned produces flowers only at the very tips of its existing stems — typically a handful per stem. Cutting back by a third creates twice the stem tips and doubles the eventual flower count.
- Moving it from indoors to full outdoor sun without acclimating. A plant that spent winter in a dim basement or low-light room has no UV tolerance built up. Putting it directly in full summer sun causes leaf scorch within days. Introduce it to outdoor light over 5–7 days, starting with 30–60 minutes of morning sun and increasing daily.
Frequently Asked Questions
Is dipladenia a perennial or an annual?
It depends on your climate. In USDA zones 9–11, dipladenia is a perennial that survives winter outdoors and comes back each year. In zones 4–8, it is either treated as an annual (planted fresh each spring) or overwintered indoors and brought back outside. Technically a tropical perennial — whether it functions as one depends entirely on whether you protect it from cold.
Can dipladenia grow indoors as a houseplant?
Yes, but with real limitations. To bloom indoors, dipladenia needs a south-facing window with direct sun or supplemental grow lights. Without strong light, it will survive but won’t flower. Most people keep it indoors through winter and move it outside for summer — that’s the most practical approach for reliable blooming. Year-round indoor growing works in a very sunny room or under a full-spectrum grow setup, but it’s not the plant’s natural element.
Why is my dipladenia not blooming?
The three most common causes are insufficient light (dipladenia needs 6+ hours of direct sun for heavy blooming), too much nitrogen fertilizer (promotes leaves over flowers — switch to a high-phosphorus bloom booster), and lack of spring pruning (which creates the new stem tips where flowers form). If the plant recently came out of winter storage, give it 4–6 weeks to leaf out before expecting blooms.
How do I overwinter dipladenia?
Bring it inside before nighttime temperatures drop below 50°F. Check for pests before bringing it in. You can keep it semi-dormant in a cool (50–60°F) low-light spot and water just once a month, or keep it actively growing in a bright sunny window with normal watering. Dormancy is lower-maintenance; active growing is better if you have the light. See the full overwintering section above for details.
Does dipladenia come back every year?
In zones 9–11: yes, reliably. It dies back in cool winters but returns from the root system in spring. In zones 4–8: only if you bring it indoors before frost and keep it alive through winter. Plants kept in dormancy in a basement or garage will lose all their leaves but the roots stay viable, and the plant leafs out again when moved back into warmth and sun in spring.
What is the difference between dipladenia and mandevilla?
Both are the same plant genus (Mandevilla), but the retail labels describe growth habit. “Dipladenia” at the garden center means a compact, bushy plant with smaller leaves that stays pot-sized. “Mandevilla” usually refers to the larger, vining form that climbs structures. The care requirements are nearly identical — same light, water, fertilizer, and winter protection needs.
How much sun does dipladenia need?
At least 6 hours of direct sun daily for reliable blooming. More is better. In partial shade (3–5 hours) you’ll get growth but minimal flowers. In deep shade, no flowers and gradual decline. For indoor growing, a south-facing window or supplemental grow light is the minimum threshold for bloom production.
Can I plant dipladenia in the ground?
In zones 9–11, yes — dipladenia can grow in-ground as a landscape shrub or ground cover and will return each year from the roots. In colder zones, planting in-ground means losing the plant to winter frost. Growing in a container is almost always the better choice for non-tropical climates because it lets you bring the plant indoors easily.
How fast does dipladenia grow?
In optimal conditions (full sun, warm temperatures, regular fertilizing), dipladenia is a fast grower during summer — adding several inches of new growth per week. A compact Rio variety will double in size between spring and late summer in ideal conditions. Growth stops when temperatures drop below 60°F and resumes when warmth returns in spring.
Why are my dipladenia leaves turning yellow?
The most common causes are overwatering (yellow lower leaves with wet soil), insufficient light (yellowing across the plant with leggy growth), seasonal leaf drop as the plant enters fall dormancy (normal, limited to older leaves), and nutrient deficiency (yellowing between leaf veins with green veins still visible). Check the soil moisture first — overwatering is by far the most frequent culprit.
More Tropical Plant Care Guides
- Goldfish Plant Care — prolific tropical bloomer with trailing stems, great for hanging baskets
- Wandering Dude Plant Care — low-maintenance trailing tropical with vivid purple and silver foliage
Recommended Products
As an Amazon Associate, Two Leaf Garden earns from qualifying purchases.